Obligations are the underlying provisions in the relevant source document. Obligations can vary substantially, from event triggered provisions to reporting requirements. The key is that obligations link directly to the legal language of the relevant fund document.
Creating new obligations
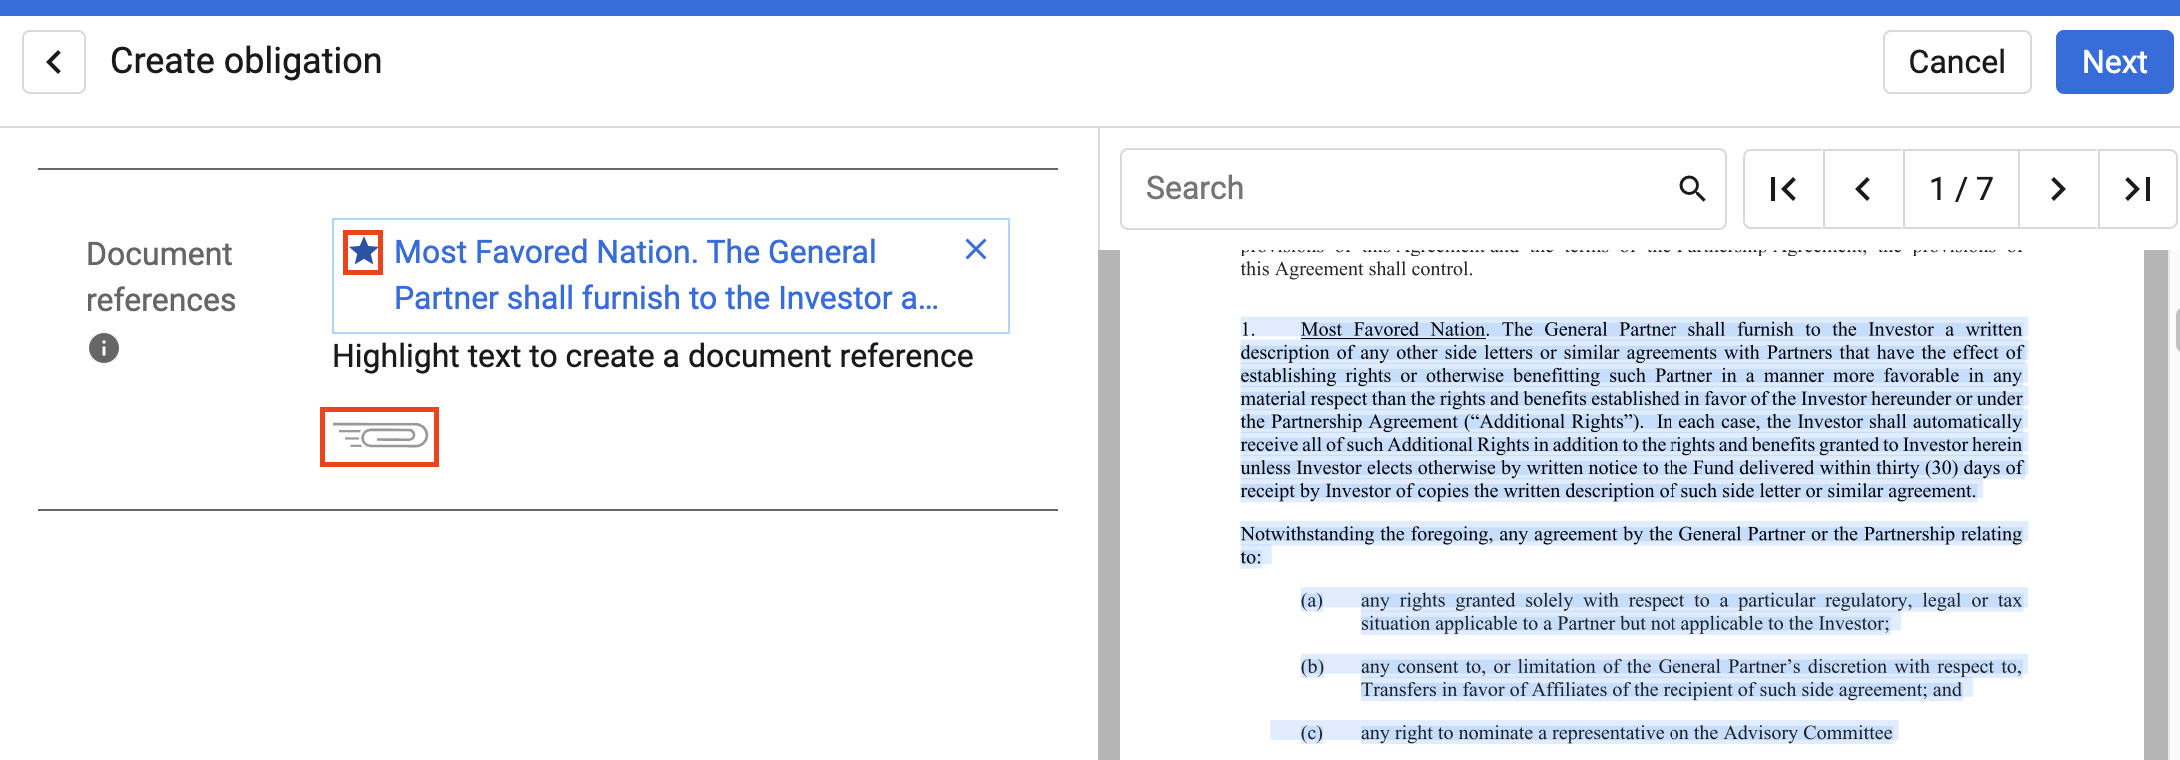
- To create a new obligation, select a document, and click Create Obligation.
- Highlight the reference text in the source document, and click the 📎 icon to select the text
- Follow the step above to create as many document references as you would like
- 💡Tip: If you are having trouble highlighting, hold down the option key on your Mac or the alt key on your PC while highlighting. For the best results, start at one of the farthest corners of a block of text
- Select the principal reference text by clicking the ⭐️ icon, and then click
- The ⭐️ icon will show up whenever you view the reference text, making it easy for you to differentiate it
- Principal reference text is the primary highlighted text to describe the underlying obligation
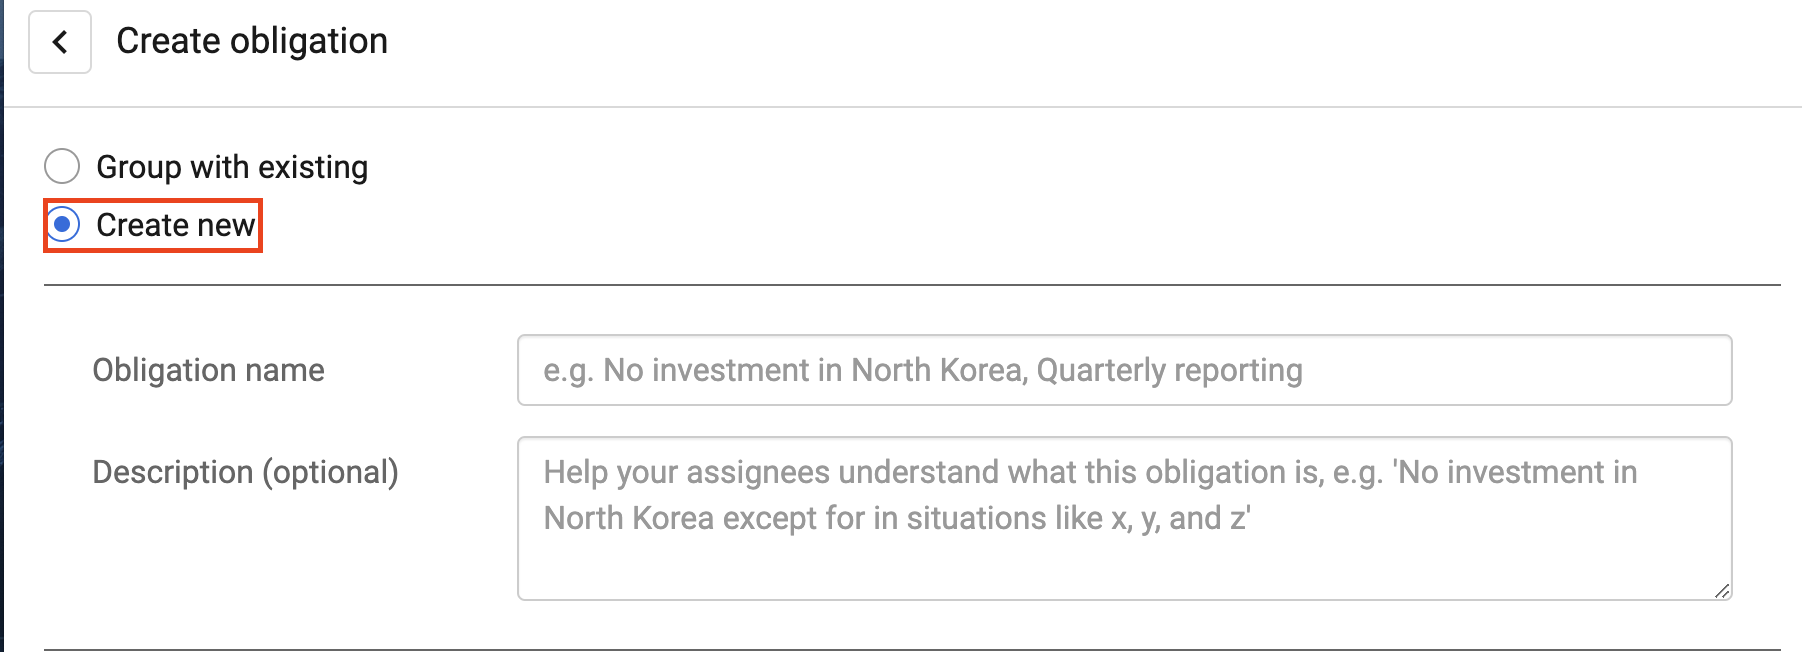
- If the obligation is new and unique, select Create New, and then enter relevant details about the obligation
- To create a task associated with the obligation, click Create Task, fill out relevant task details, and then Save.

💡Tip: All frequencies are based on calendar days, not business days. However, if you select a due date on a calendar day that does not exist in all months, future due dates will default to stay within the most recent month, quarter, half-year, or year end.
For example, if you select Monthly as the frequency and Jan 31, 2023 as the first due date, the platform will create recurring obligations on:
- Feb 28, 2023
- Mar 31, 2023
- Apr 30, 2023
- May 31, 2023
- Jun 30, 2023
- ...and so on
Grouping existing obligations
If the obligation you would like to create is the same as, or similar, to obligations you've previously created, group the obligations together. See the SmartGroups article for more details.
To group the obligation upon creation:
- Follow steps 1-3 above
- Once you have highlighted and selected the principal reference text, click Next and select Group with Existing
- Insight's SmartSearch technology will analyze the highlighted text and suggest provisions to group with based on similarity
- If SmartSearch does not produce the obligation you would like to group this provision with, you can manually search for the desired obligation
- Search by the name and description of the obligation, or search the underlying reference text
- Select the obligation or SmartGroup you would like to group the obligation with and click Next.
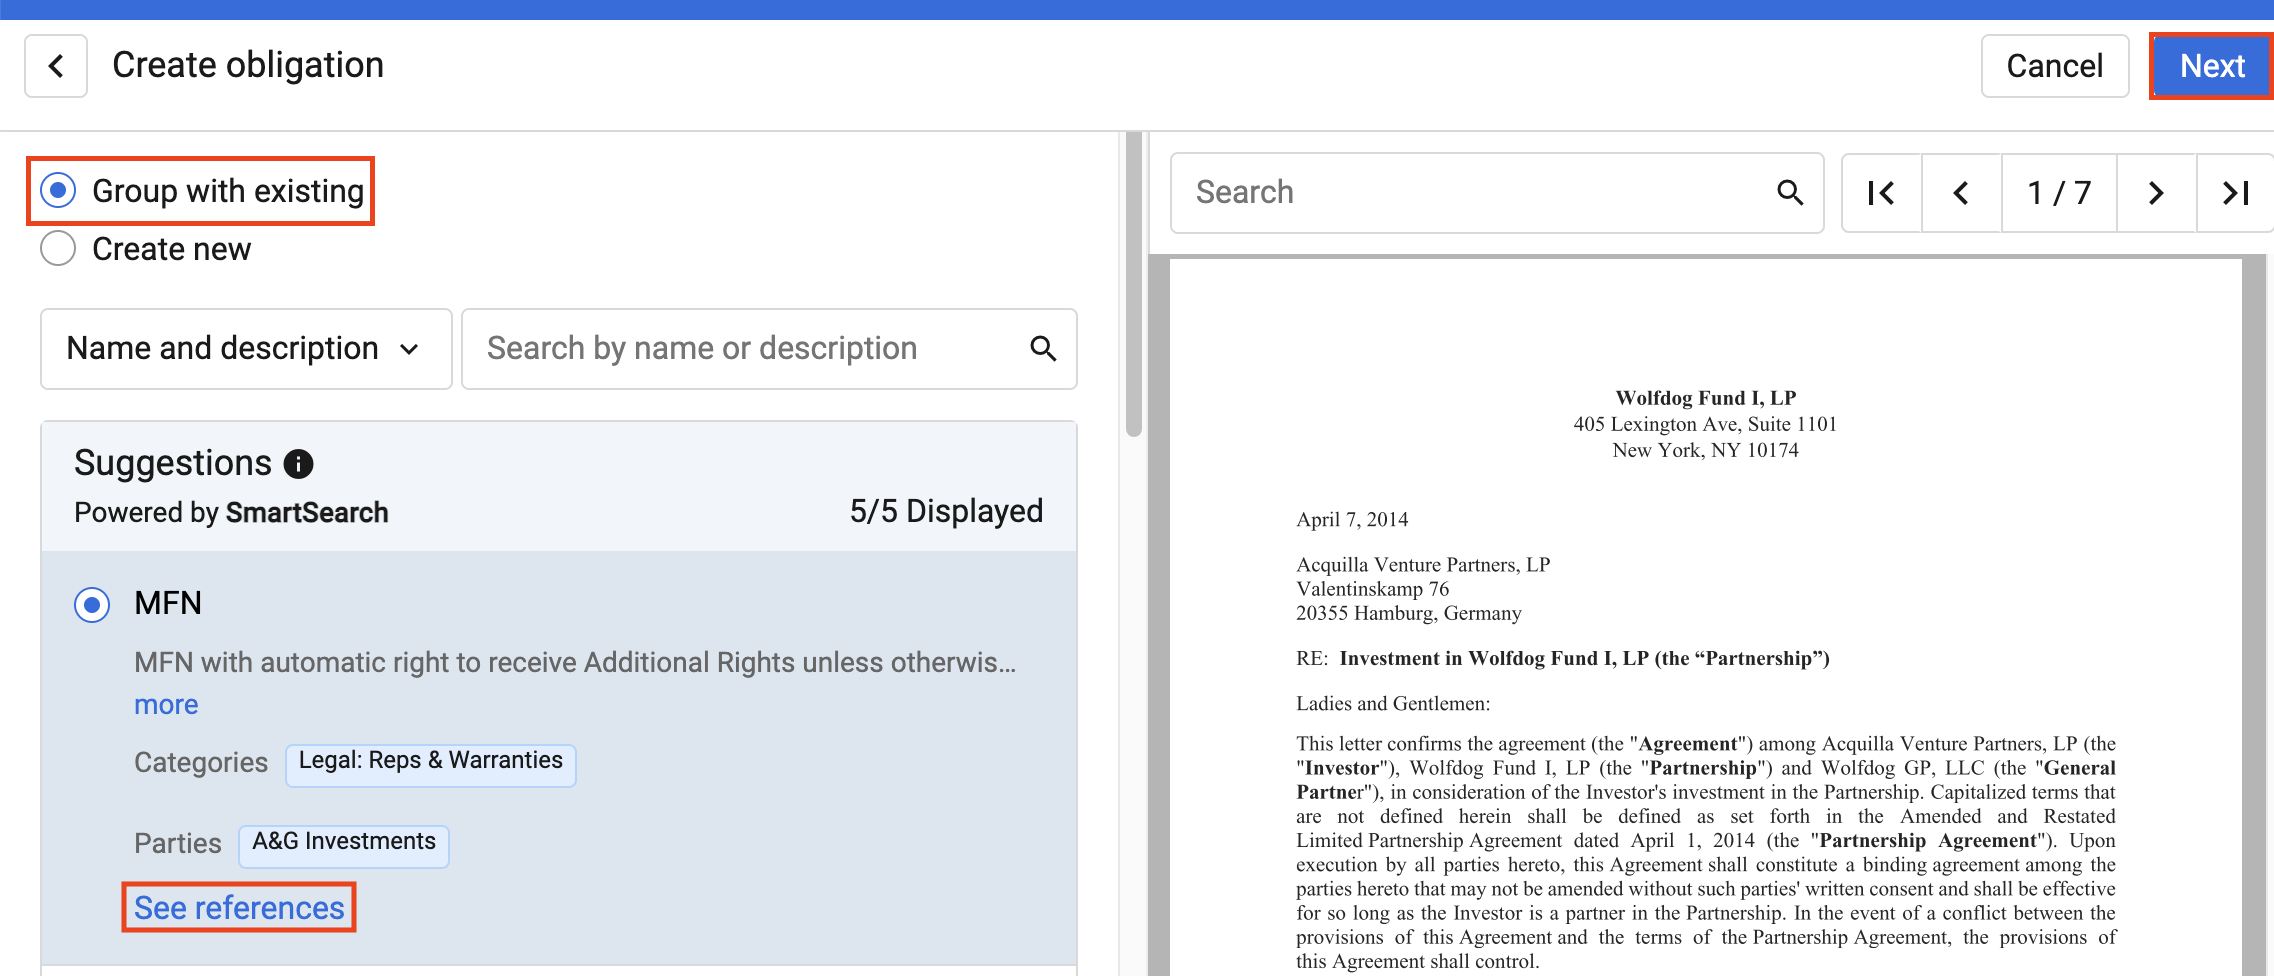
Tip: To ensure you are grouping together like terms, expand the SmartGroups and click on See References to see the exact reference texts associated with each obligation
- Modify any relevant obligation details, add a group description, and click Save.
Note: The obligation name cannot be edited, but all other fields can be modified
Custom categories
Tag your obligations with categories to organize them and to be able to leverage Insight's filtering tools. We have included many built-in categories to capture the most common obligations across all fund documentation. You can also create custom categories to fit your bespoke documentation needs.
To create a custom category:
- Navigate to the obligation dashboard and click on an obligation
- Click on the ✏️ icon to edit the obligation
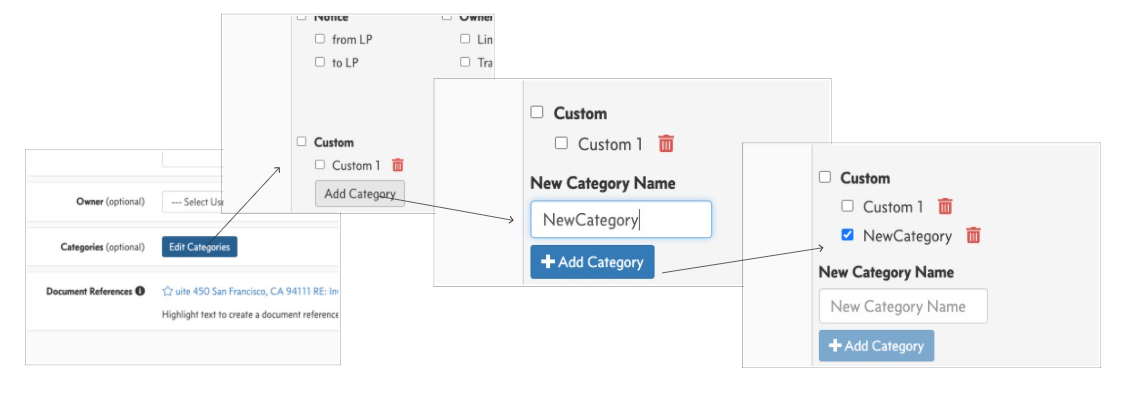
- Select Edit Categories
- Scroll to the bottom of the drop-down menu and click Add Category.
- Enter the custom category name and click
- Note: Custom category names cannot be edited once they are created
AI Generated Obligations
When uploading a document into the app, the AI will generate obligations for the document that you will be able to approve.
- To see the obligations the AI generated, navigate to the fund documents page. You will see 0 of # approved under the obligations column
- Click into the document to view the obligations the AI created
- The AI will automatically assign an obligation name, description, highlight the reference text, apply categories, and create tasks associated for the obligation
- If the obligation details look correct, simply click the approve button
- If you would like to make an edit to the AI generated obligation, click the kebab menu and select edit
- From here you can edit the obligation name, description, owner, categories, highlighted reference text, and add and remove tasks
- Once you are done with your edits, click the approve button at the top right of the page to navigate back to the obligations
- If you would like to delete an obligation you can click the kebab menu and select delete
- If for some reason the AI did not create an obligation for the document, you can follow the steps in the creating new obligations section to create the obligation manually